The Beginner's Guide To MMORPG Tycoon 2

About the developer
VectorStorm is an indie game developer founded by Trevor Powell. They are best known for their games MMORPG Tycoon (2008), and MMORPG Tycoon 2 (2018, Early Access). Since 2018, Trevor has been hard at work creating MMORPG Tycoon 2, a Tycoon-style game where you are the creator and Admin of your very own Massively Multiplayer Online Role Play Game. You can check out more about VectorStorm here.
About MMORPG Tycoon 2
MMORPG Tycoon 2 is the sequel to MMORPG Tycoon. Which was created as a submission for the TIGSource Procedural Generation contest. MMORPG Tycoon (1) released in 2008. MMORPG Tycoon 2 was released into early access in January, this year. The game plays very familiarly to other Tycoon types of games. Think RollerCoaster Tycoon, Cities: Skylines, and the likes. You are the Admin and Developer of your own MMORPG Game and you have to create zones and content for your players to play. You also manage the balance of character classes by providing each class with their own abilities they must learn as they level. You are able to do the same with NPC monsters as well.
You can find out more about what the game has to offer by continuing to read this tutorial and also by viewing the steam page linked below!
Welcome to the MMORPG Tycoon 2 Beginners Guide and Tutorial! Let's get right into it!
The very first step is to buy the game. You can get it through Steam here.
Starting a new game
After loading up MMORPG Tycoon 2, you will be introduced to a simulated computer desktop with various options. They are as follows:
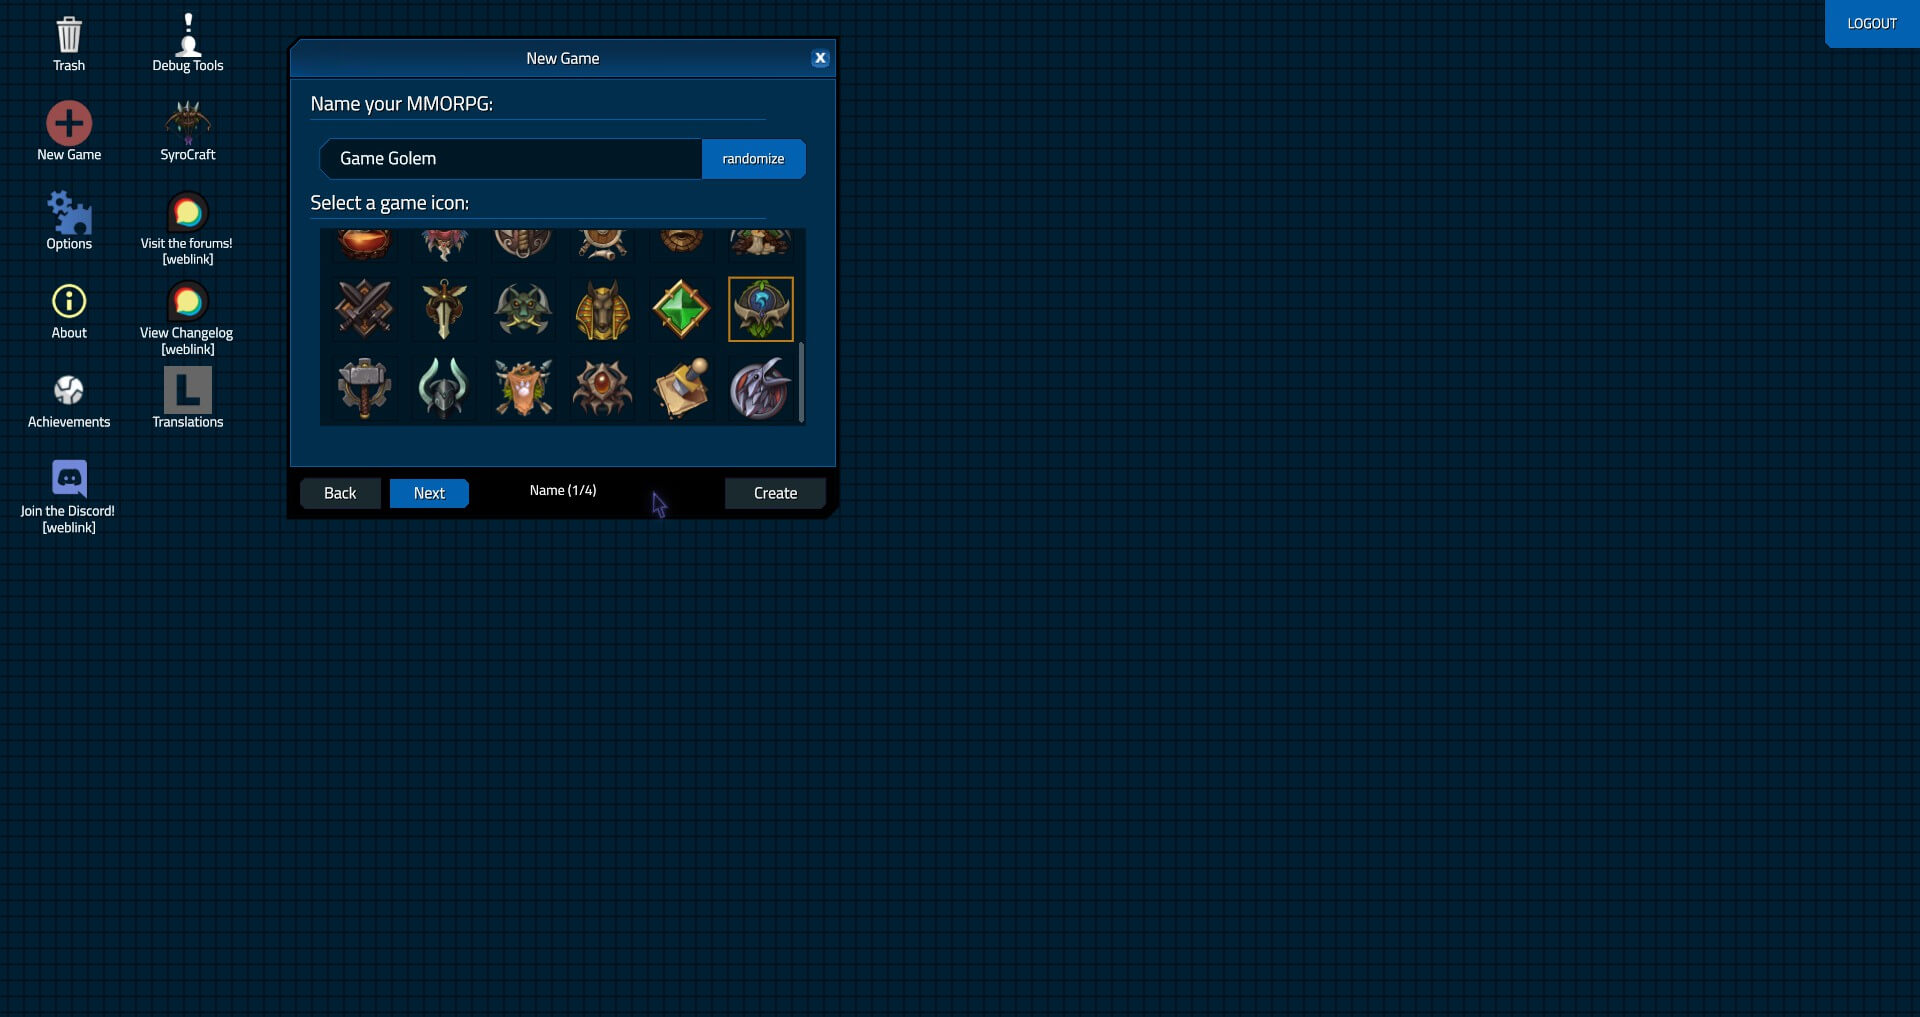 Trash, New Game, Options, About, Achievements, Discord, Debug Tools, Forum links, and Change log.
If you have a save game already, you'll see your save under the name you chose and the icon as well. For this guide, I am assuming it's a fresh start. So click that New Game icon. You will be prompted to enter the name of your game, or you may choose to randomize it. You are also required to select an icon for your save.
Clicking "Next" takes you to the MMO Type section. Each type offers a different starting experience. In its current form, that means a different Tech, which we will discuss later in this post. It also includes where stat points are allocated. For this post, we'll choose Player Vs. Player (Note: Choosing Free to Play will make it much harder to make money for your game.) and click next moving us on to the stats page.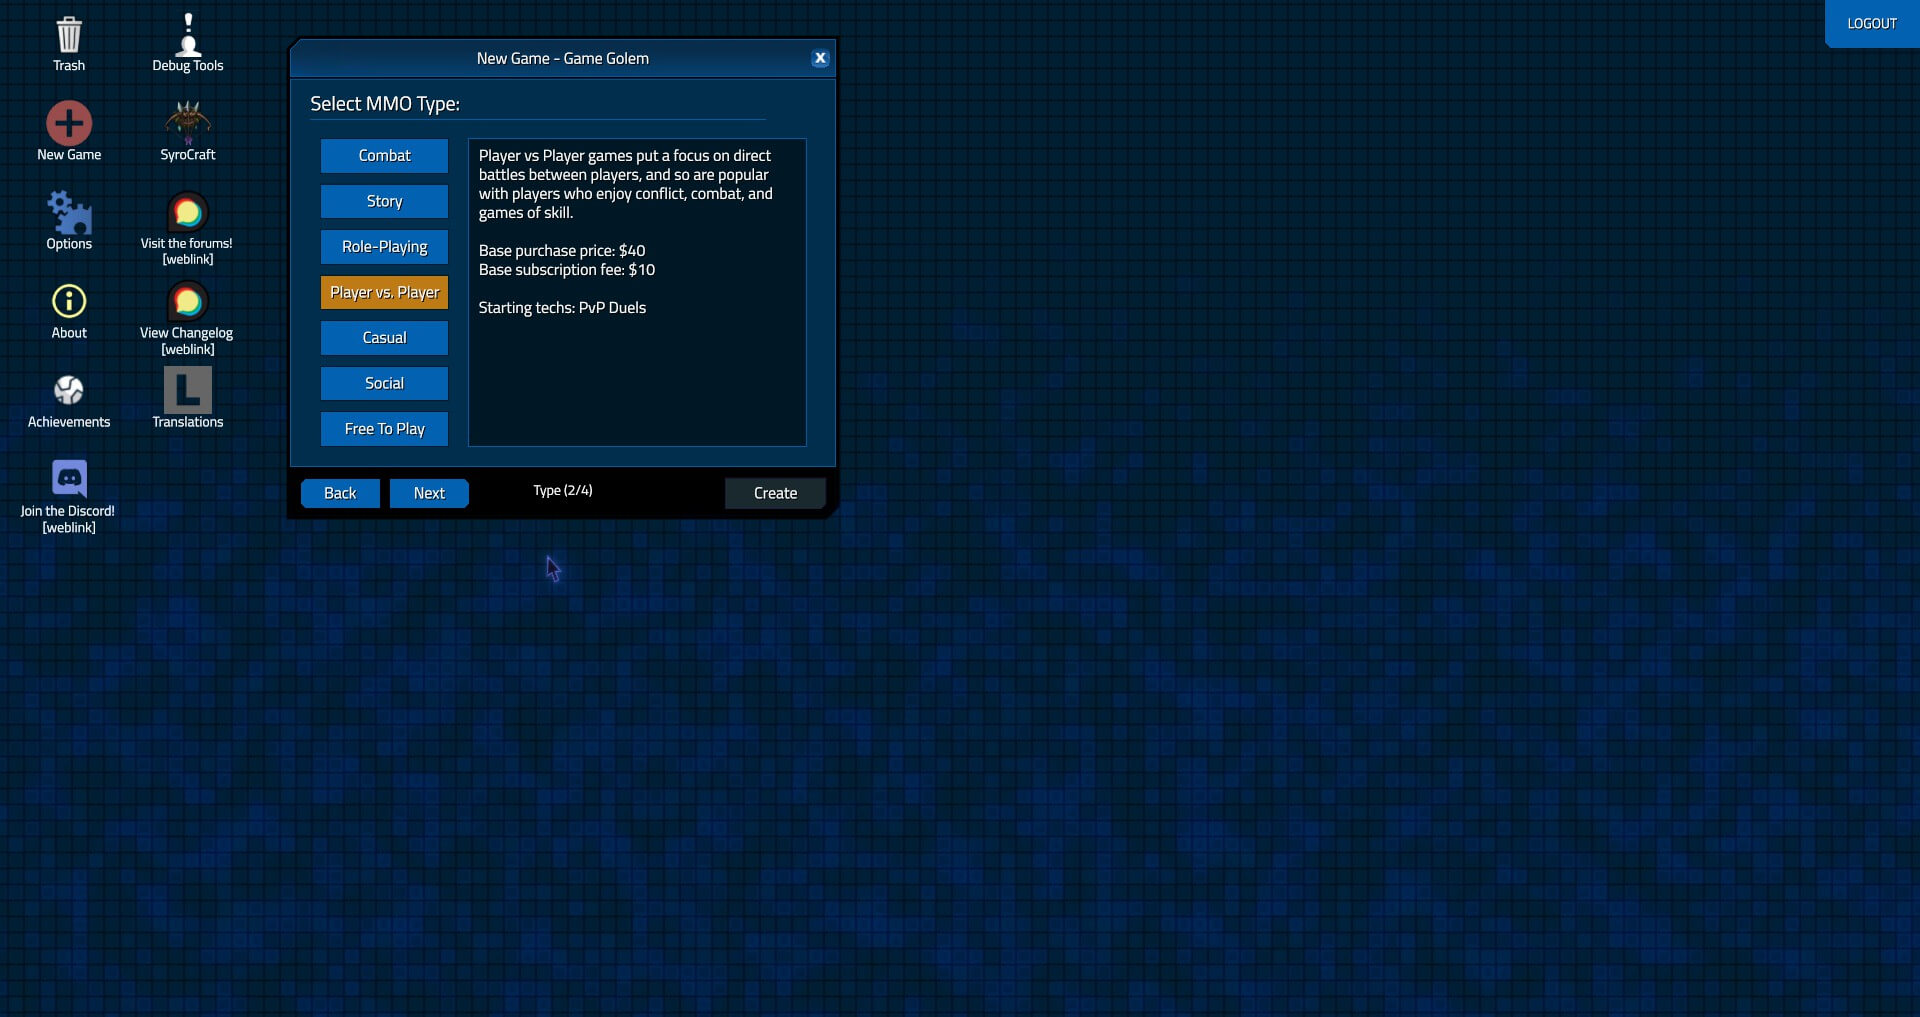
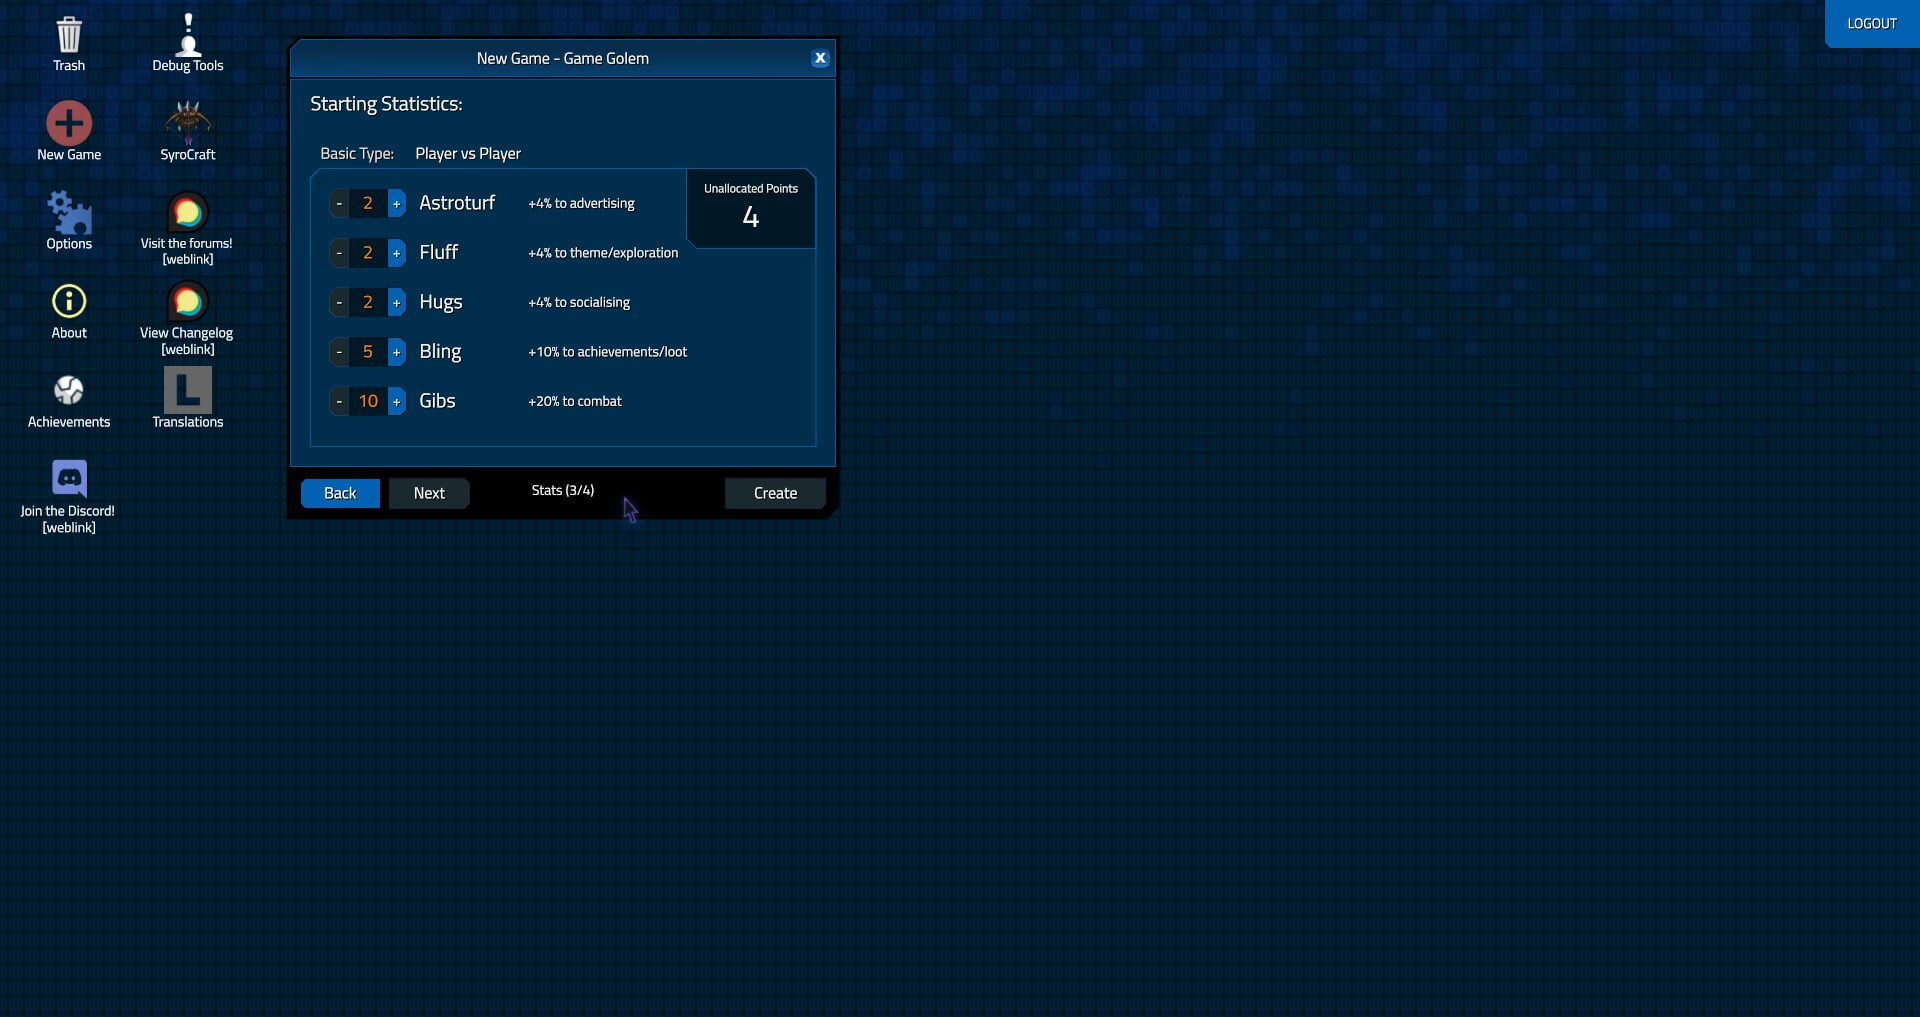
The Starting Statistics page lists stats that pertain to your MMO.
- Astroturf: Advertising
- Fluff: Theme/exploration
- Hugs: Socialising
- Bling: Achievements/loot
- Gibs: Combat
For the PvP MMO type we are automatically assigned the stats: 2 Astroturf, 2 Fluff, 2 Hugs, 5 Bling, and 10 Gibs. We are also provided with 4 unallocated points to put where we see fit. Each point increases the % value by 2 per point. In this case I put all 4 points into advertising. Doing so increases the amount of new subscribers.
As for the other stats, each one improves the likelihood that a player who enjoys that playstyle joins the game. There currently isn't a whole lot to satisfy each players need right now. No worries, they don't pursue those needs with specific tasks just yet. However, Trevor is constantly adding new things that you will need to be ready to incorporate into your game world.
Entering your new game
Once you have chosen each aspect of your new MMO and click create you are thrust into your new randomly generated world. From here you may want to immediately pause your game as to not unintentionally drain your money. You should have $99,200 so It would be a slow drain, but a drain nonetheless. 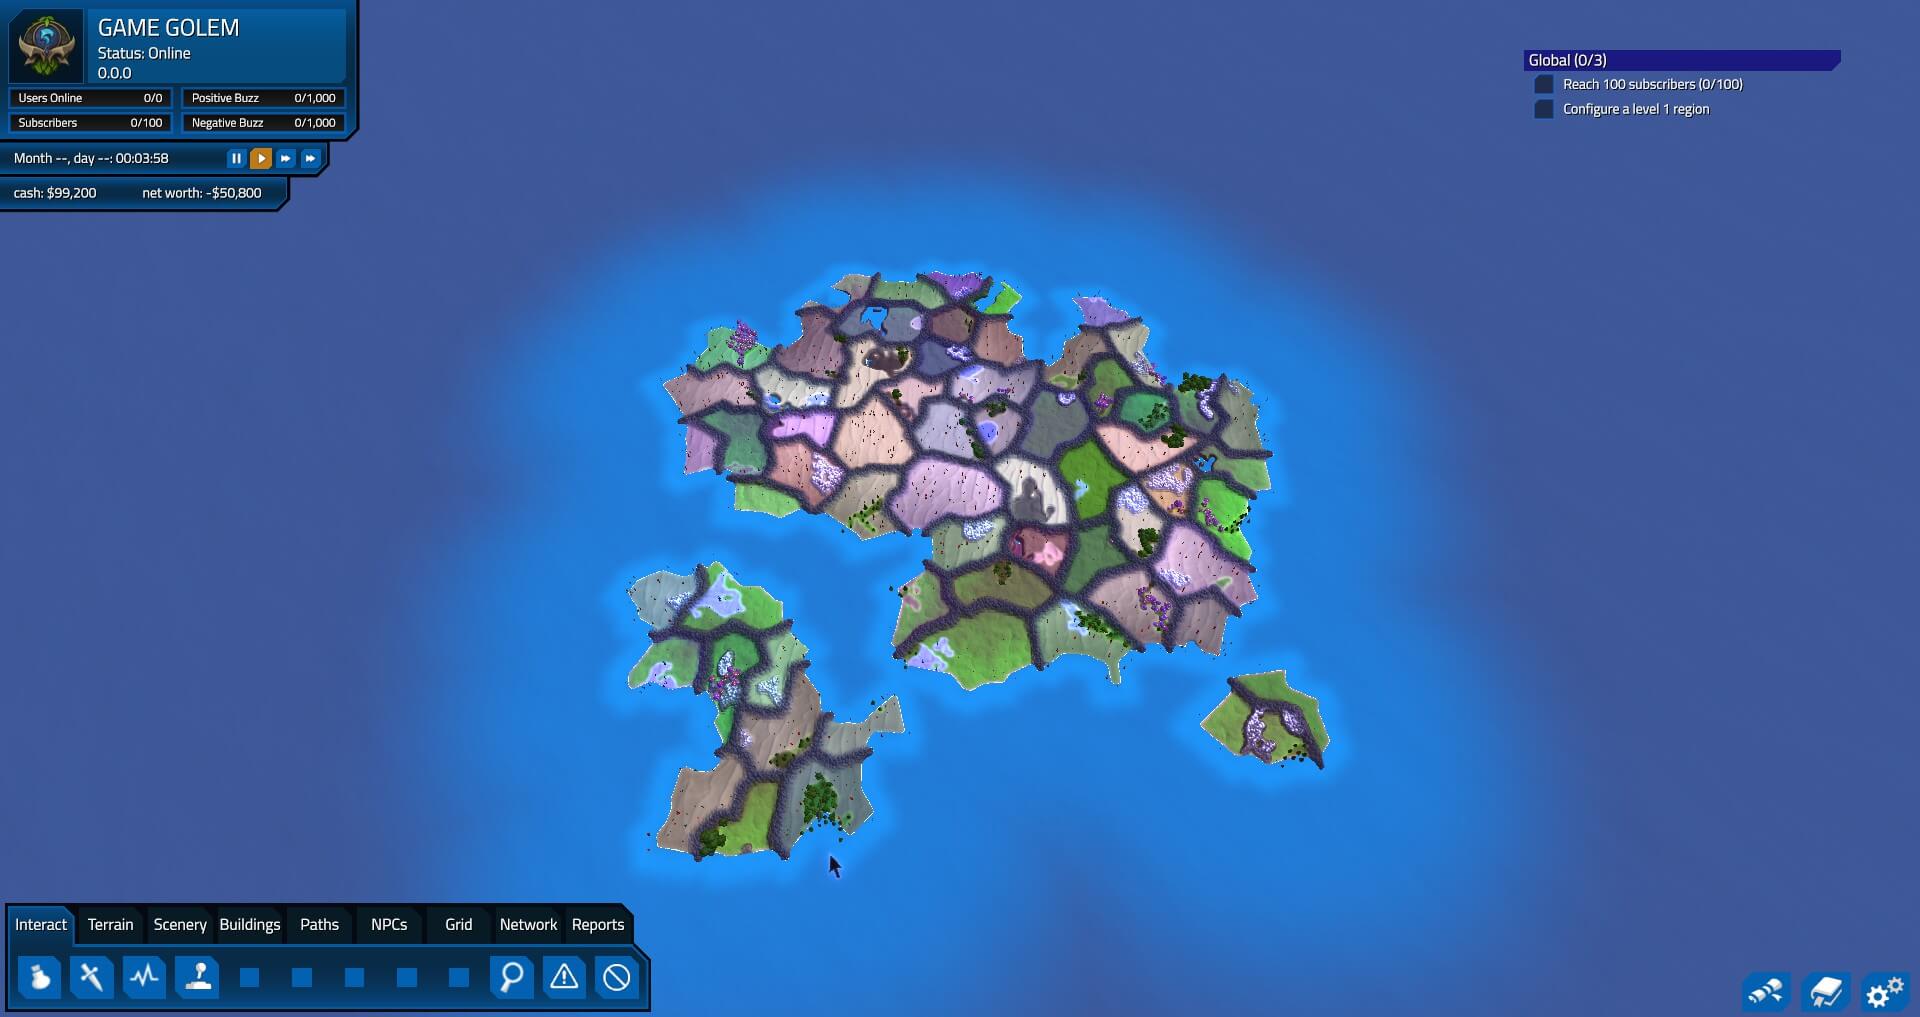
Configuring a Region
Step 1: Buying a region
Now that we're into the game we need to purchase a region. Click the "Grid" section in the action bar on the bottom left. The first button (the one with the $ sign in it) is used to purchase regions. Regions cost $5,000, so pick carefully! At the time of this writing, it costs $5,000 to reactivate regions that you deactivate, with the limited amount of cash available, it's imperative that you retain whatever you can for adding other elements.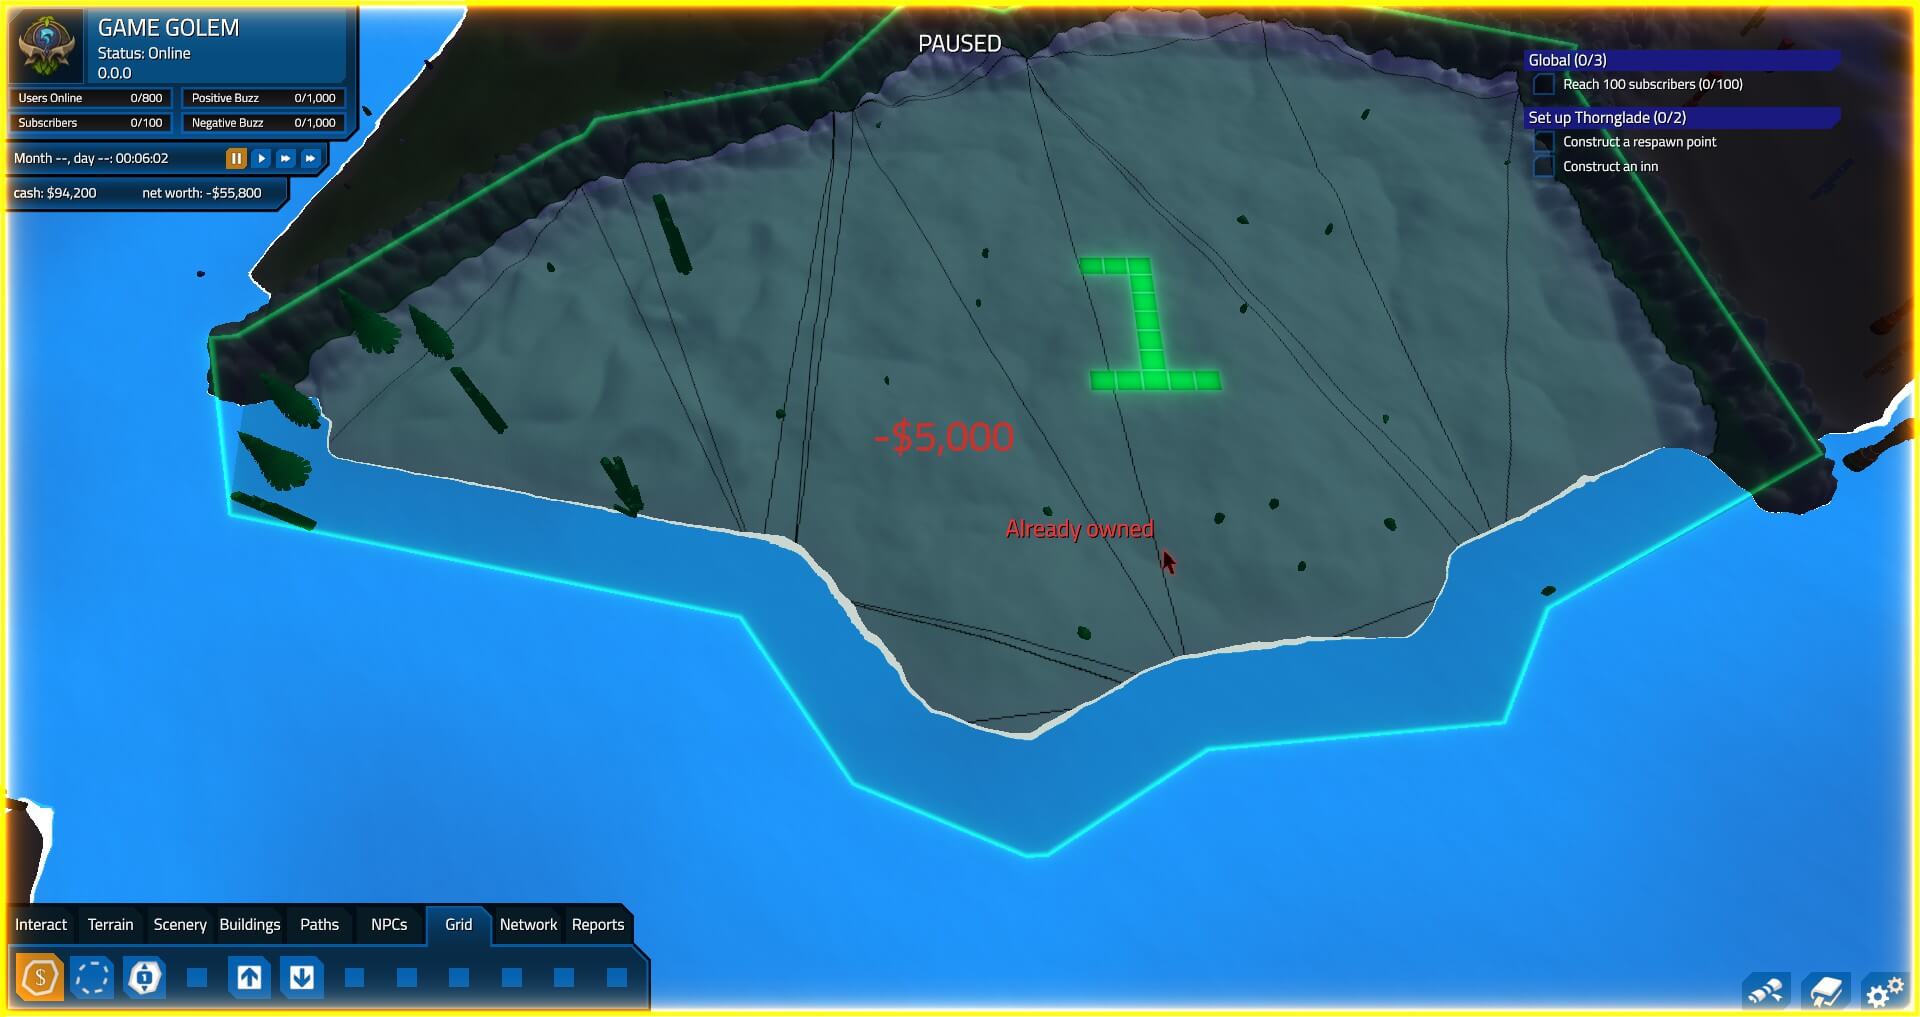
Step 2: Setting up a starting area
Alright, you bought your first region. Before you can start attracting players you need to setup the first starting area and release your first major version: 1.0.0! You can reach 1.0 after placing the two required buildings for your region to be used by players. Those two buildings are the Respawn Point and an Inn. Once you have placed these two builds you should be prompted in the top left to "Upgrade".
When you click on the upgrade button a screen with the text,
"Congratulations - you're about to release major version
1.0.0
Pick an upgrade!"
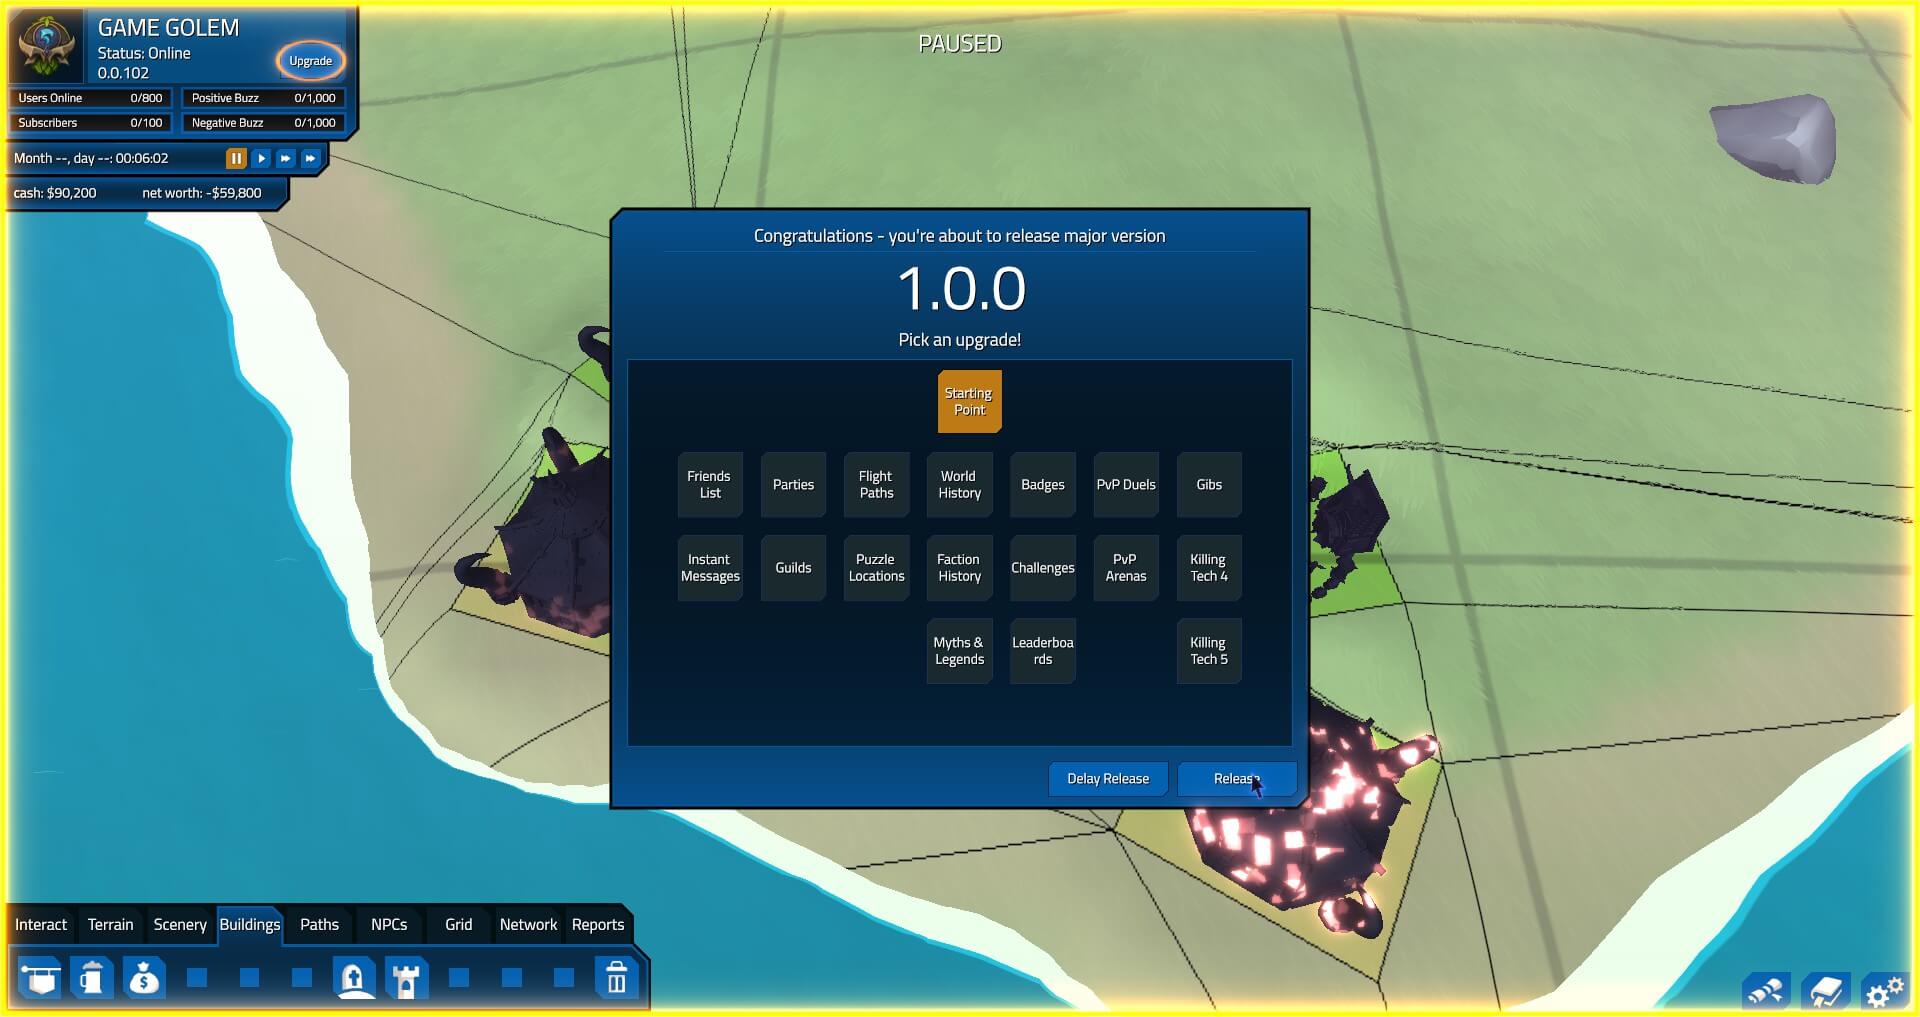
The only upgrade available at this point is the "Starting Point" box. Select it and hit "Release." Note: Pressing "Delay Release" will just close the menu and let you continue doing whatever you want. You are not required to upgrade. However, in this case if you want to actually get players you must release the 1.0.0 version.
1.0.0 is released. Now what? Let's plop a starting point. A new icon displays in the Buildings menu. Select one and plop it in your region. It doesn't have to be right next to the other buildings you plopped, but players tend to like to set their home at the Inn. Also if you have PvP enabled, players will duel each other and die, so it's a good idea to have the respawn point (graveyard) nearby.
Remember it's a good idea to keep the simulation paused throughout this process or you could make players angry or confused because they cannot find something to do. Some players won't mind as much and will socialize, but eventually they will unsubscribe and you will lose that player.
You may want to consider providing a tavern and some shops in the general vicinity as well. Let's go over what each building does really quick.
- Inns: The inn is used by players to logout. It is required that at least one inn is placed in each region as listed in the region setup list in the top right of new regions.
- Taverns: The tavern is a place for players to socialize and hang out.
- Additionally, since the Party Update, players will go to the tavern to look for and join parties.
- Shops: There are a few different shops to utilize. Each of which provides a different service for your players.
- The Potion Shop: sells potions to players that they will use in combat to restore health or mana.
- The Shop… Shop: will buy items from your players. Items are usually picked up after combat or as quest rewards.
- The Blacksmith: Sells level-appropriate weapons that last until they gain a level.
- Starting Points: The starting point provides players their way into the world. Placing multiple of them can be used to separate players in a single region or spread them out between multiple level 1 regions.
- Note: You can place starting points in higher level regions, players will still start at level 1. Any Monster NPC they come across will likely kill them and frustrate them into logging out.
- Respawn Points: Are used by your players when they die, but also by your Developers and Game Masters (GMs) to teleport around the world. More on them in the next part.
- Landmarks: Are tall buildings that players can use to guide them to areas. Players can always see landmarks, no matter where they are in a region.
- Useful for when you don’t want to have a town/inn right at the entrance to a zone, every single time.
With that information out, that wraps up part one of this tutorial.
You can go to part two by clicking here.
For all things gaming like us on Facebook and follow us on Twitter. You can also join our Steam Group.
